How to unzip a download, working with zipped files
Zipped & Unzipped Files
What is a Zipped file?
A zipped file is a computer file whose content of one or more files are “compressed” for storage or transmission purposes and usually has the extension “.zip” at the end of the file.
ZIP files are great for sending large files or when you are limited on space on your computer.
Most embroidery machines can’t read zipped files. Most embroidery software programs can’t read zipped files, either. If you have downloaded a Zipped file, you will need to unzip the file before moving it to your machine. No worries, it is a painless process to unzip.
How to Unzip a file on a PC
It is very easy to unzip a file on a PC (Windows-based operating system). When the file is downloaded from your My Designs, it should appear in the upper right-hand corner of the page (depending on your browser but usually the case).
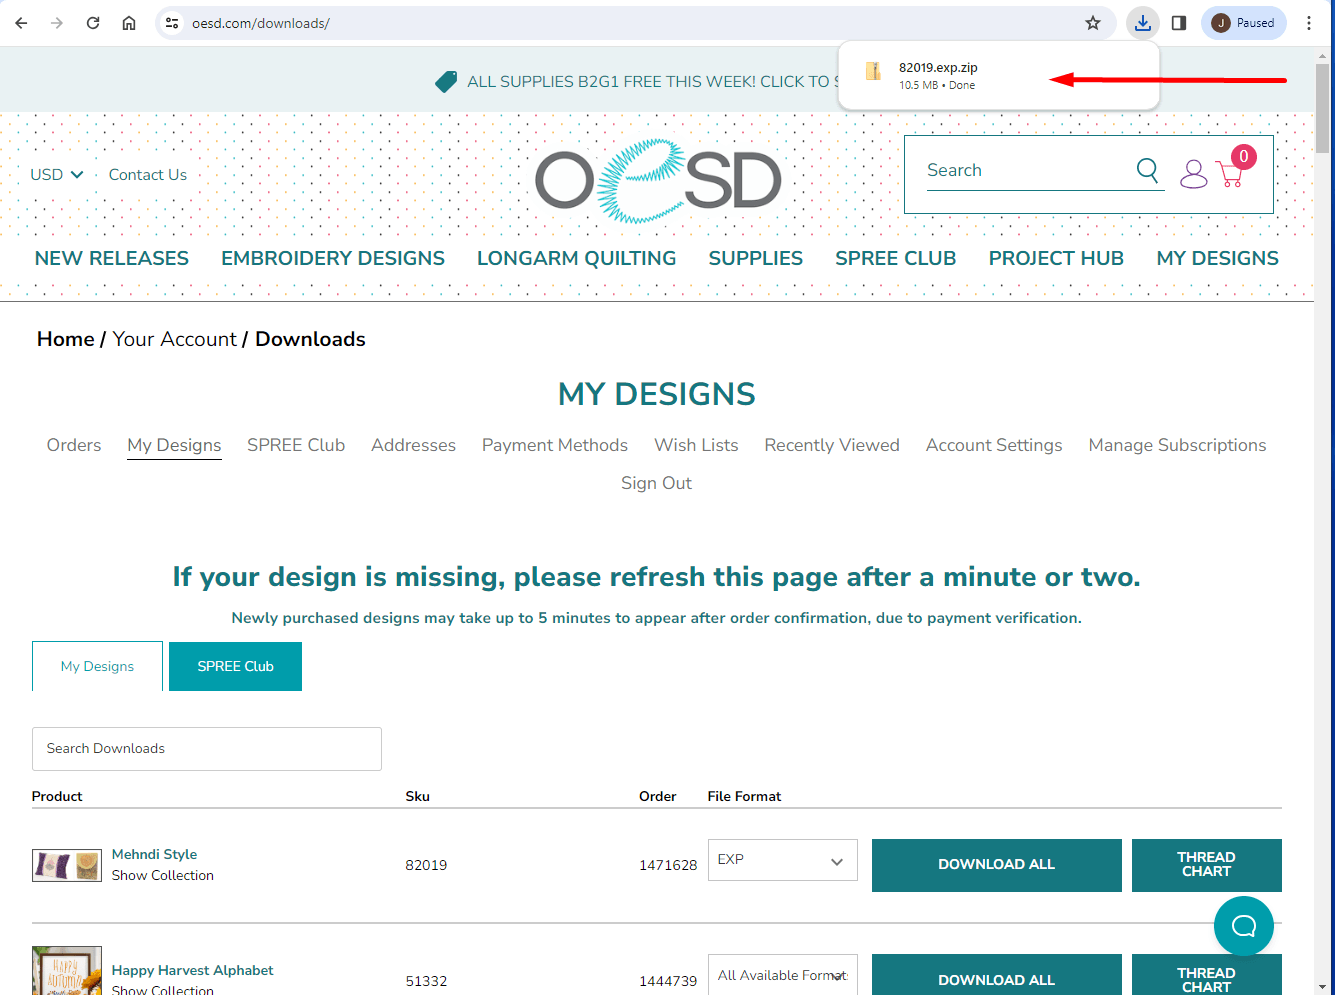
Click on the file. The download folder will appear with the files that need to be “unzipped”. At the top of the folder, the Extract tab will be highlighted in pink.
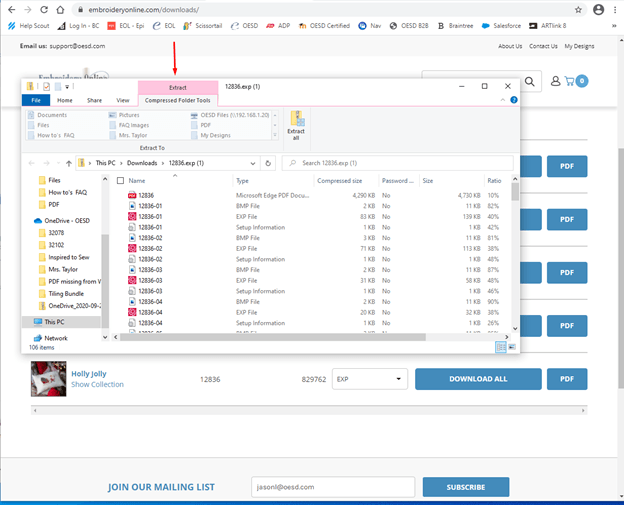
From this point, there are several options that you can choose to do.
Click “Extract All”.
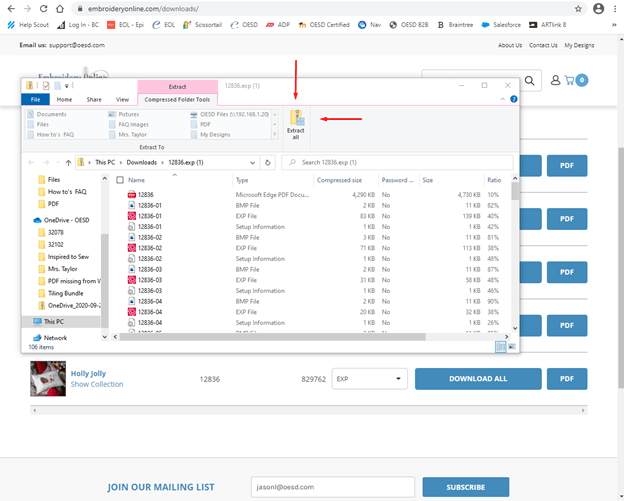
A window will open asking where you would like your files to be extracted. Here you select the location of the files. If you use a USB to transfer your files to the machine, you can extract them to this location. You can also put them in another folder or even transfer them to a CD. To select the USB, click on “Browse”.

In this example, we will be saving to the USB that will be put in the machine. In the folder that appears once you click “Browse”, you can select the USB from the column on the left side of the folder. Your USB will need to be plugged intothe computer for thsi option. Click on the USB (D:) and the name will appear in the upper bar of the folder.
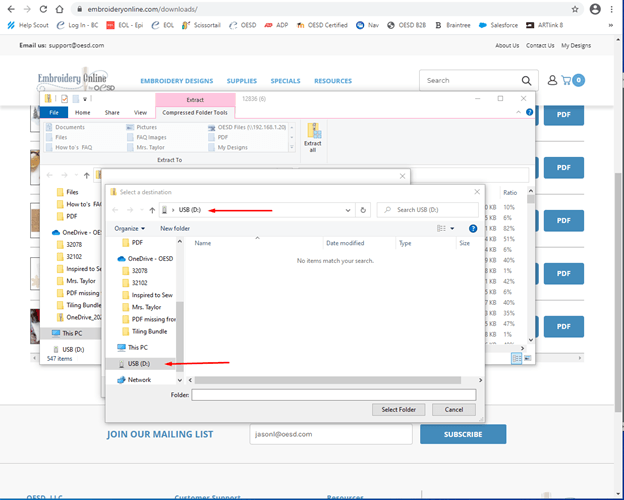
Click on “Select Folder”. Now click on the Extract button and the files will be “unzipped” to the USB. Your USB with the loaded design(s) is now ready to plug into the machine for embroidery.

Another option for “unzipping” a file is as follows. This requires you to have both folders, the USB and Zip folder, open at the same time.
Start by finding the design that you would like to download and unzip.

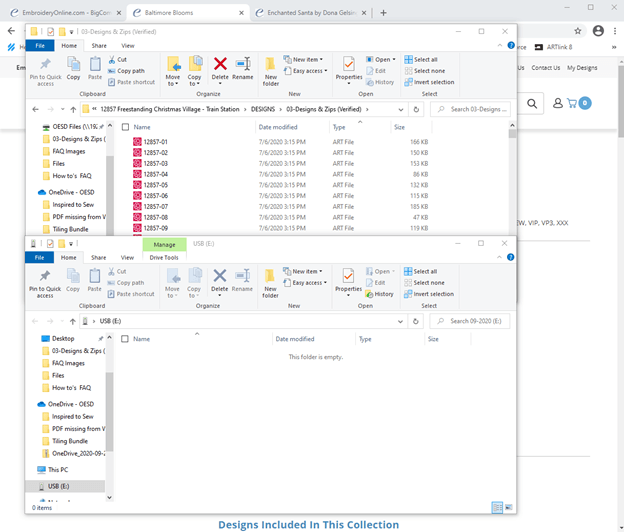
Click once on the file that appears in the lower corner of the screen. When the folder appears, you can click, hold, and drag on the top bar (inside the red box) of the folder and move it to the top of the screen.

Now you can insert the USB into the computer USB port. The USB folder will appear. In this example, the USB is the E: Drive and is labeled USB. Move the folder down so that both folders are visible. You can move this folder down the same way as the design folder with click, holding, and dragging on the top bar of the folder.
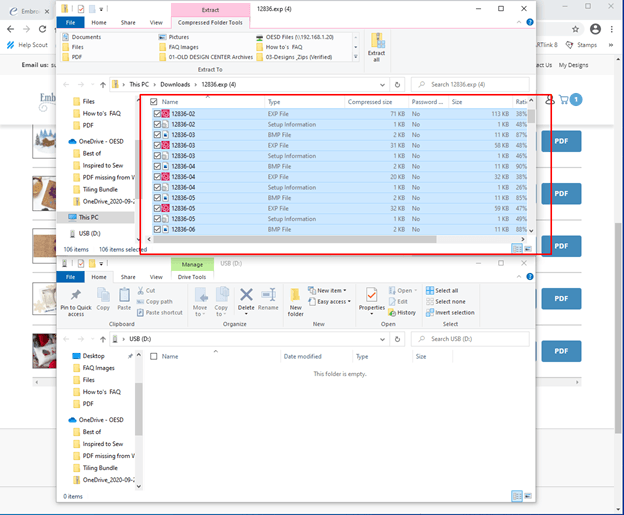
You can select the Design folder now (the top folder that has the zipped files). Highlight the files in the Design folder. They should appear blue in the box once they are highlighted.
Now left-click, hold, and drag the highlighted files to the USB folder. You should see an icon showing the files to be copied to the USB.
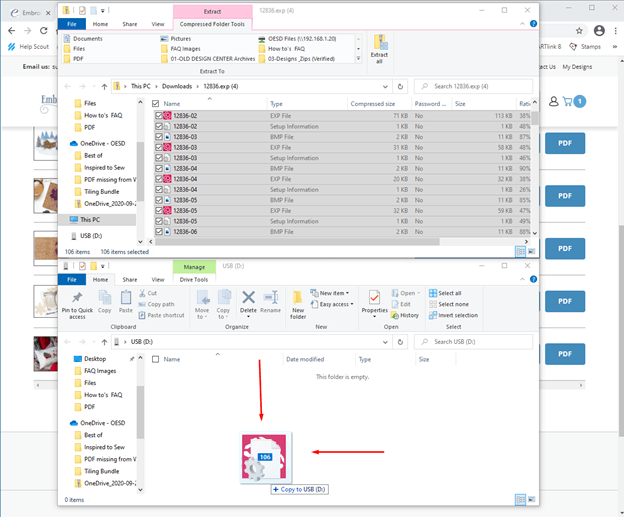
A box should appear moving the files to the USB folder if you have done this correctly.

Your zipped files are now extracted to the USB folder and unzipped. You can now remove the USB and plug it into the machine for embroidery.
How To Unzip on a Mac
Unzipping files on a Mac is super easy. Just double-click on the zipped file and your computer should create an unzipped folder right next to the original.
As with any issue that might occur, always feel free to reach out to us at support@oesd.com for assistance.